


土木一 Carlos Aaron Yap
Surveying Practice is a required course for the Civil Engineering major. It mainly focuses on applying the things we learned in Surveying (1) to complete the project given by the professor. This year’s final project was to make a 3d model of a building in NTU using coordinates and points that were set and surveyed by ourselves.
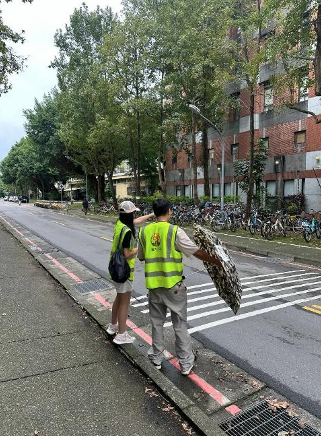
At first, we were each assigned to a team and were given a target building. Each building has 2 close GCPs (benchmark) we could use. Using that information, we had to find suitable locations to set up points by pinning a nail to the ground and labeling it using a correction pen.
In the following weeks, we had to conduct leveling using optical levels to obtain information regarding our points’ elevation using the GCPs. To ensure accuracy while doing this task, the optical level needs to be set up roughly in the middle of two points. Moreover, if the distance between the points is more than 40 meters, a turning point needs to be placed to ensure that the readings will not have such a big error. After setting up the optical level, we need to ensure it’s leveled by adjusting the screws to slightly adjust the height and center the bubble. In order to improve the quality of the data, we are also required to do 2 runs, direct and back, so we have an additional set of data to compare.
After we finished conducting leveling, we needed to check all our data by doing some tests. If the sum of the elevation difference from direct and back runs exceeds the allowed misclosure, it means our data has an error large enough not to be ignored. Therefore, another observation must be done.
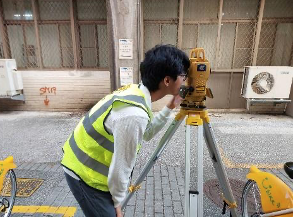
Once we are done with leveling, we may then proceed to traverse. Using an instrument called total station, we can find the distance between two points, and the angle it forms inside the closed polygon. However, unlike leveling, to ensure accuracy the total station must be set on top of the point (nail) which is also called centering. Total station is also more sensitive than the optical level, even a tiny twist of the screw can cause displacement to the bubble, which can result in the total station being tilted. Moreover, since the total station has direct and reverse mode, and we have to measure in both modes, there’s no longer any need to do direct and back run, instead we just have to do 2 sets of observation for every point to have additional data to compare to.
Similar to leveling, after we finish doing traverse, we need to check the reliability of our data. Since it’s a closed polygon, the total angle measurement has to match with the actual total inner angle of the polygon. For example, for a pentagon, it will have a total of 540o. If there’s a discrepancy between the two angles, we need to make an adjustment to all our angles based on the difference. Afterwards, we can also calculate the preliminary azimuth angle of each point, the area of the polygon as well as the coordinates of every single point. In my opinion, this is the most challenging part of the entire course. Due to the sheer amount of comparisons and checks that we need to do. Moreover, various calculations need to be done in order to obtain useful data from the raw observation data. A slight miscalculation or mistake in any of the steps can lead to an error in the final result. I recommend you to discuss properly with your group and divide the tasks according to prevent a single member from overworking. Other team members can also double-check the calculations and data of their teammate. If you feel like the data or numbers seem a little weird, don’t hesitate to ask your teammates, seniors or TAs to prevent any errors in calculation.
After completing the data check, the TA helped us fly a drone above our designated building in order to capture photos for us to be able to render and produce a very similar 3d model. Although the TA are helping us, we still needed to set the fly path so it covers all of our building, including the points and GCPs. Lastly, we need to render the model using Agisoft Photoscan and complete the project.

Despite all this, UAV was only introduced to the course about 5 years ago. Before then, students had it much rougher than we did. Although we more or less have the same procedure and project, to produce an accurate 3d model, they had to go to every point and survey the building. They had to observe multiple points set on building’s body to obtain a point curve. However, for some more complex building, students would have to observe large quantities of points to obtain a dense point curve and replicate the building. Not only was this inefficient, but it was also not optimal and didn’t quite catch the point of surveying. Therefore, after careful consideration by some professors, they decided to incorporate the use of UAVs in the course, since not only was it quicker and future proof, it also produces a very dense point curve which is key to creating an accurate 3d model of the building. This makes NTU one of the few universities who uses UAV for such a fundamental course.
Overall, I find this course fairly time-consuming since aside from doing field work, we also have to do revisions and corrections on our free time. However, as tiring as this course can be, I find the course to be quite entertaining and useful. This course can be quite relaxing when you’re doing field work. You can also grab the chance to interact with others and make new friends. By immediately applying the things I learned in Surveying (I), I find myself having a better understanding of the fundamentals of surveying and geomatics.